This guide outlines the automated validation process and user permissions for creating and editing local unit entries on the GO platform. The system ensures data integrity through a structured approval workflow and clearly defined user roles.
By default all local units are set to externally managed. If National Society requests that they have a person to validate the local units, they they can request the Information Management Team at IFRC (im@ifrc.org) to change the status of the local units. The team can change the status from externally managed to internally managed. Thereafter, National Societies can add, edit, delete and validate the local units on the GO platform.
¶ Submission and Locking Process
When a user submits a new local unit or edits an existing one, the entry is immediately locked. This lock prevents any further modifications while the submission is pending validation. The entry is then automatically forwarded to the designated validator based on the rules of the validation workflow.
¶ The Tiered Validation Workflow
The validation process follows a three-tiered escalation system to ensure every submission is reviewed in a timely manner. Each tier is allocated a specific response window.

¶ Step 1: Local Validation
The submission is first sent to a local validator, who is a designated focal point at the National Society level. This validator has 7 days from the submission date to either Approve or Disapprove the entry.
¶ Step 2: Regional Validation
If the local validator does not take action within the 7-day period, the system automatically escalates the submission to a regional validator. The regional validator then has a new 7-day window from the date of escalation to review and act on the submission.
¶ Step 3: Global Validation
If the regional validator also fails to respond within their 7-day window, the submission is escalated for a final time to a global validator. The global validator will make the final decision to Approve or Disapprove the entry.
¶ User/ Validator Roles and Permissions
Administrators can configure permissions to ensure entries are reviewed by the correct personnel. Validators can be assigned to approve specific local unit types based on their portfolio, or they can be flagged to validate all unit types. The roles are structured with escalating levels of permission and scope.
Externally managed local units are validated automatically. They cannot be edited on GO.
Only Super Users can delete local units that are externally managed
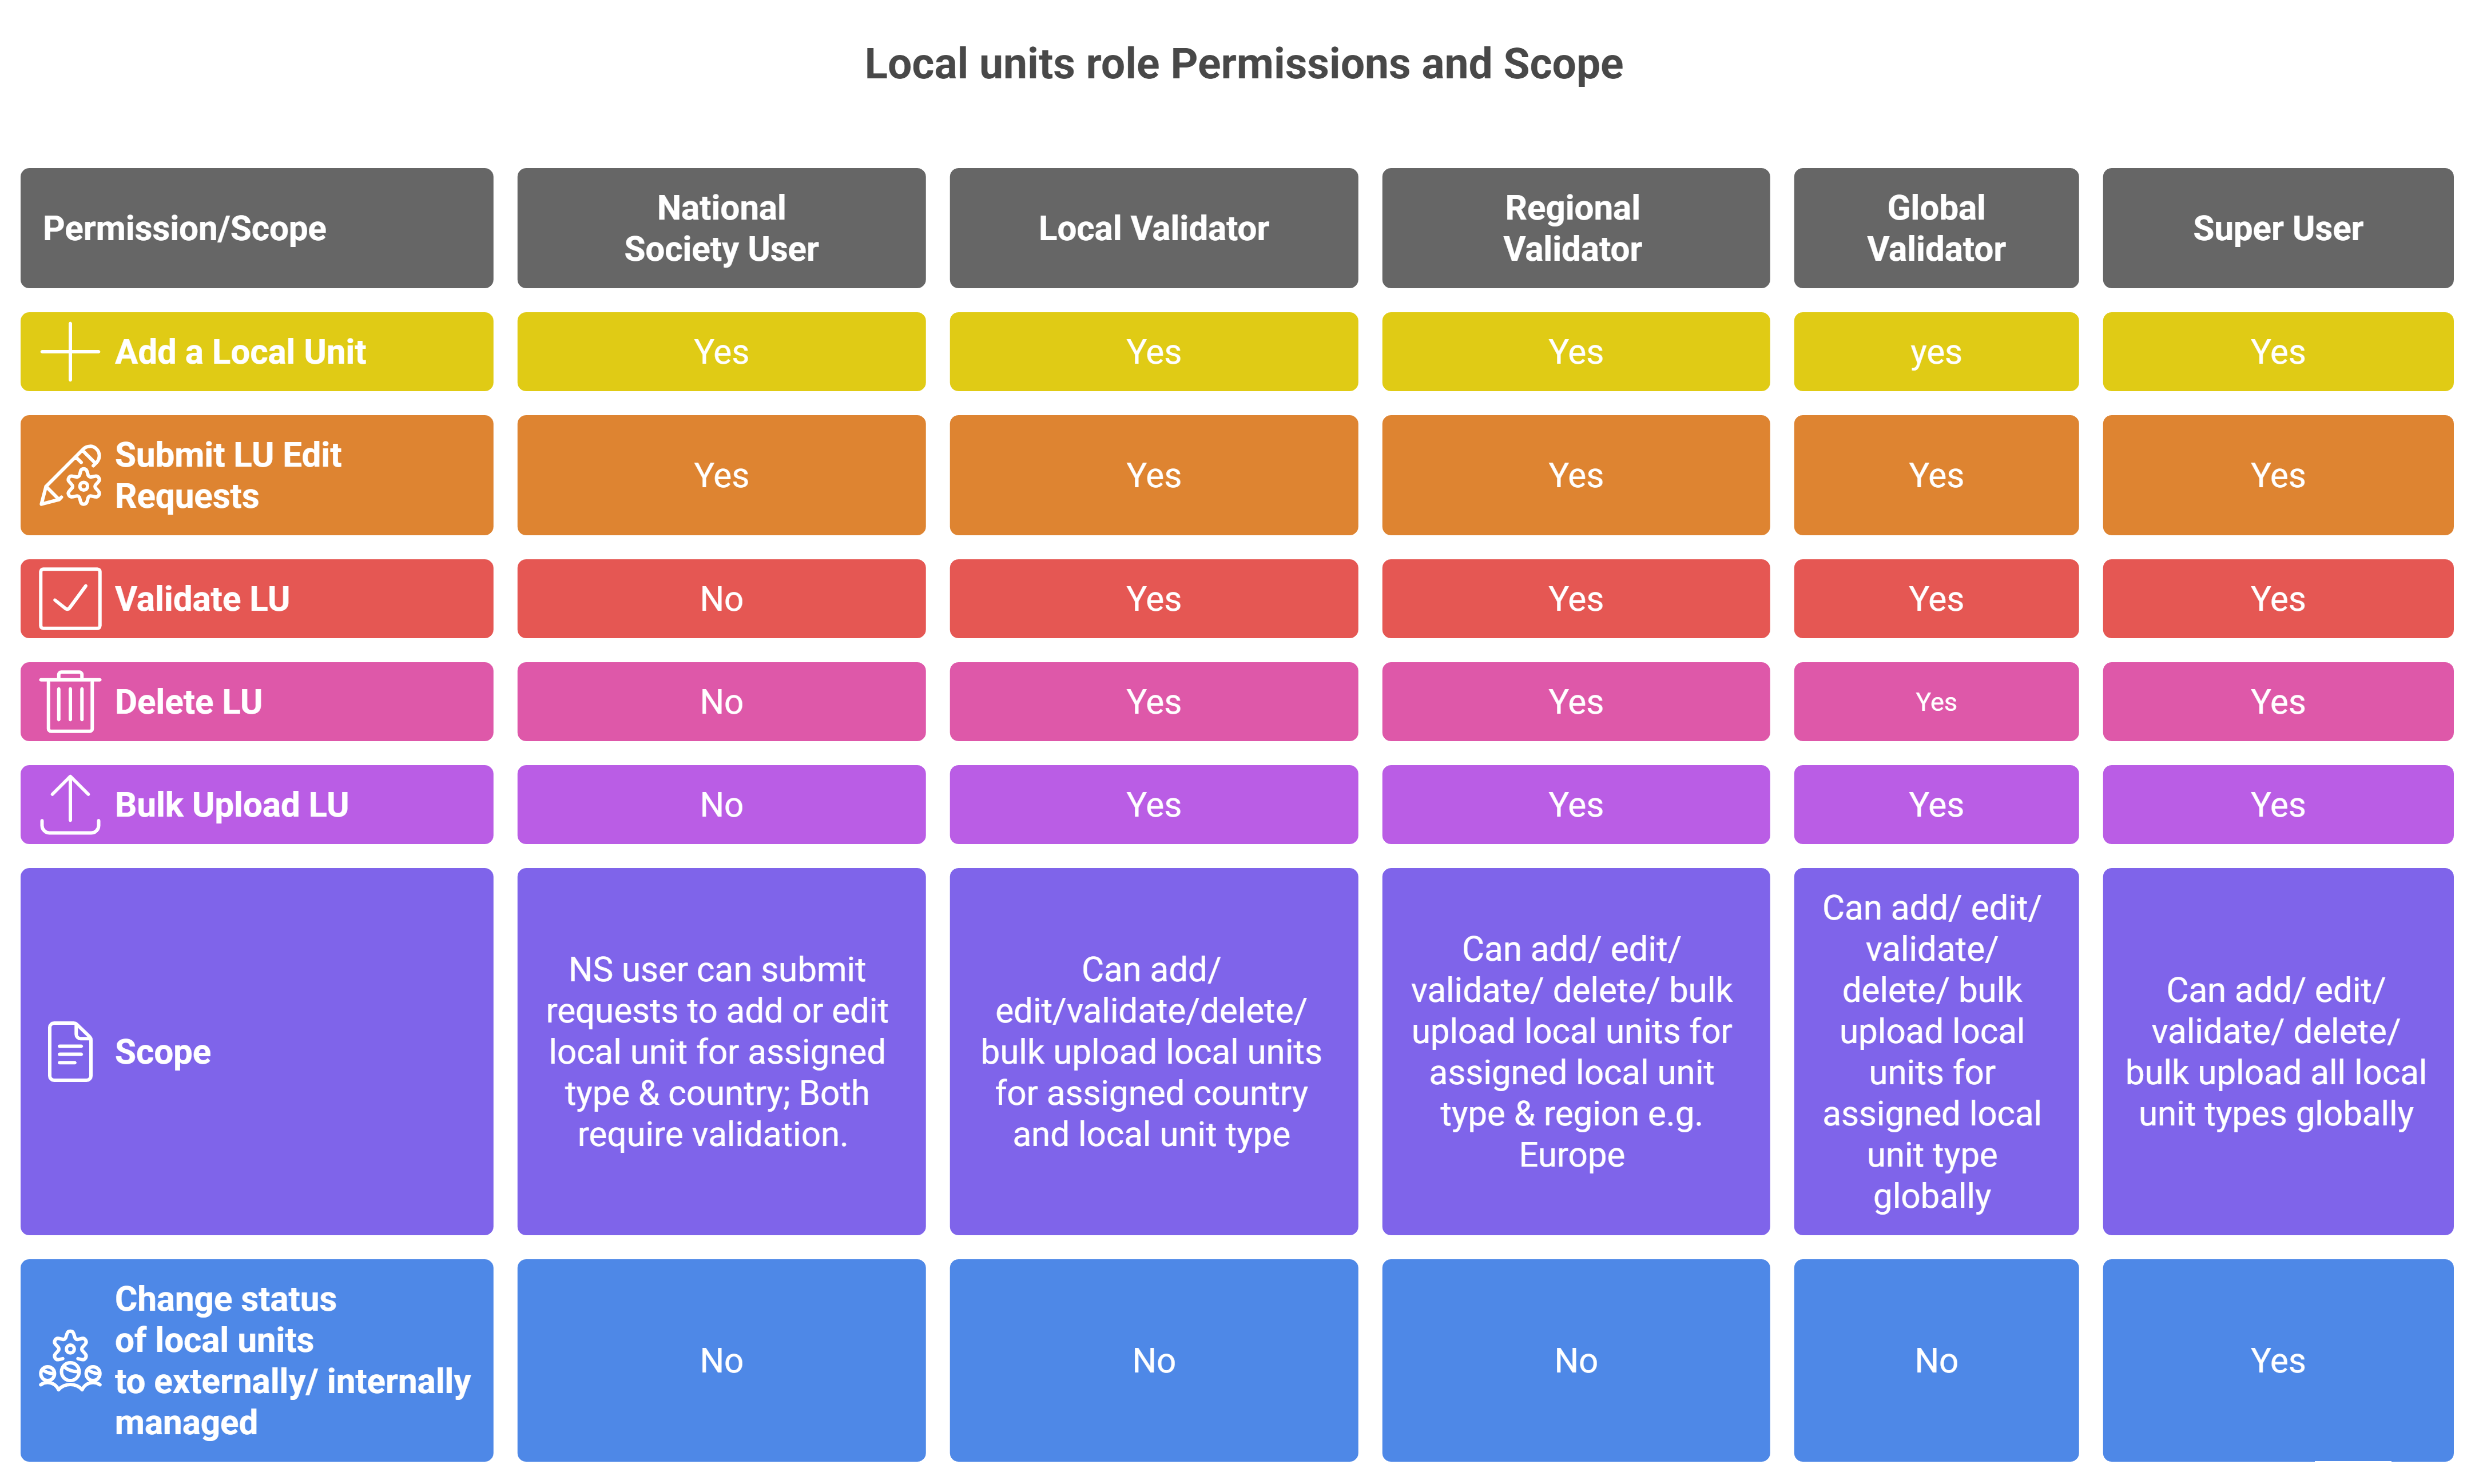
¶ National Society User
National Society users can add a local unit for their country on the GO platform. They can also submit an edit request for an already existing and previously validated local unit. Both addition and editing of local units have to go under validation workflow. National Society users donor have the permissions to bulk upload local units, deleting a local unit and changing the status of a local unit to externally managed.
¶ Local Unit Country Validator
This role operates at the country level. The validator has permissions to add, edit, validate, delete, and bulk upload externally managed local units for their assigned country and assigned local unit type.
¶ Regional Validator
Operating at a regional level (e.g., Europe, Asia Pacific), this validator has permissions to add, edit, validate, delete, and bulk upload externally managed local units for their assigned region and assigned local unit type.
¶ Global Validator
This role has permissions to add, edit, validate, delete, and bulk upload assigned externally managed local units across all regions and countries.
¶ Super User
The super user holds all the permissions of the local, regional, and global validators. In addition, they have the unique ability to change the status of a local unit to or from being externally managed.
If no eligible validator is found at one level (for example, no local validator is assigned to the submitted unit type), the system will automatically escalate the request to the next level to find an appropriate validator.
The figure below shows the local unit permissions and scope for managing the local units on the GO platform
¶ Setting Up Permissions for Local Validator
The Regional and global Validators can configure the permissions for local (country) level validators on the GO Admin Panel.
- To login, visit the GO admin panel at
https://goadmin.ifrc.org/en/admin/login/?next=/en/admin/
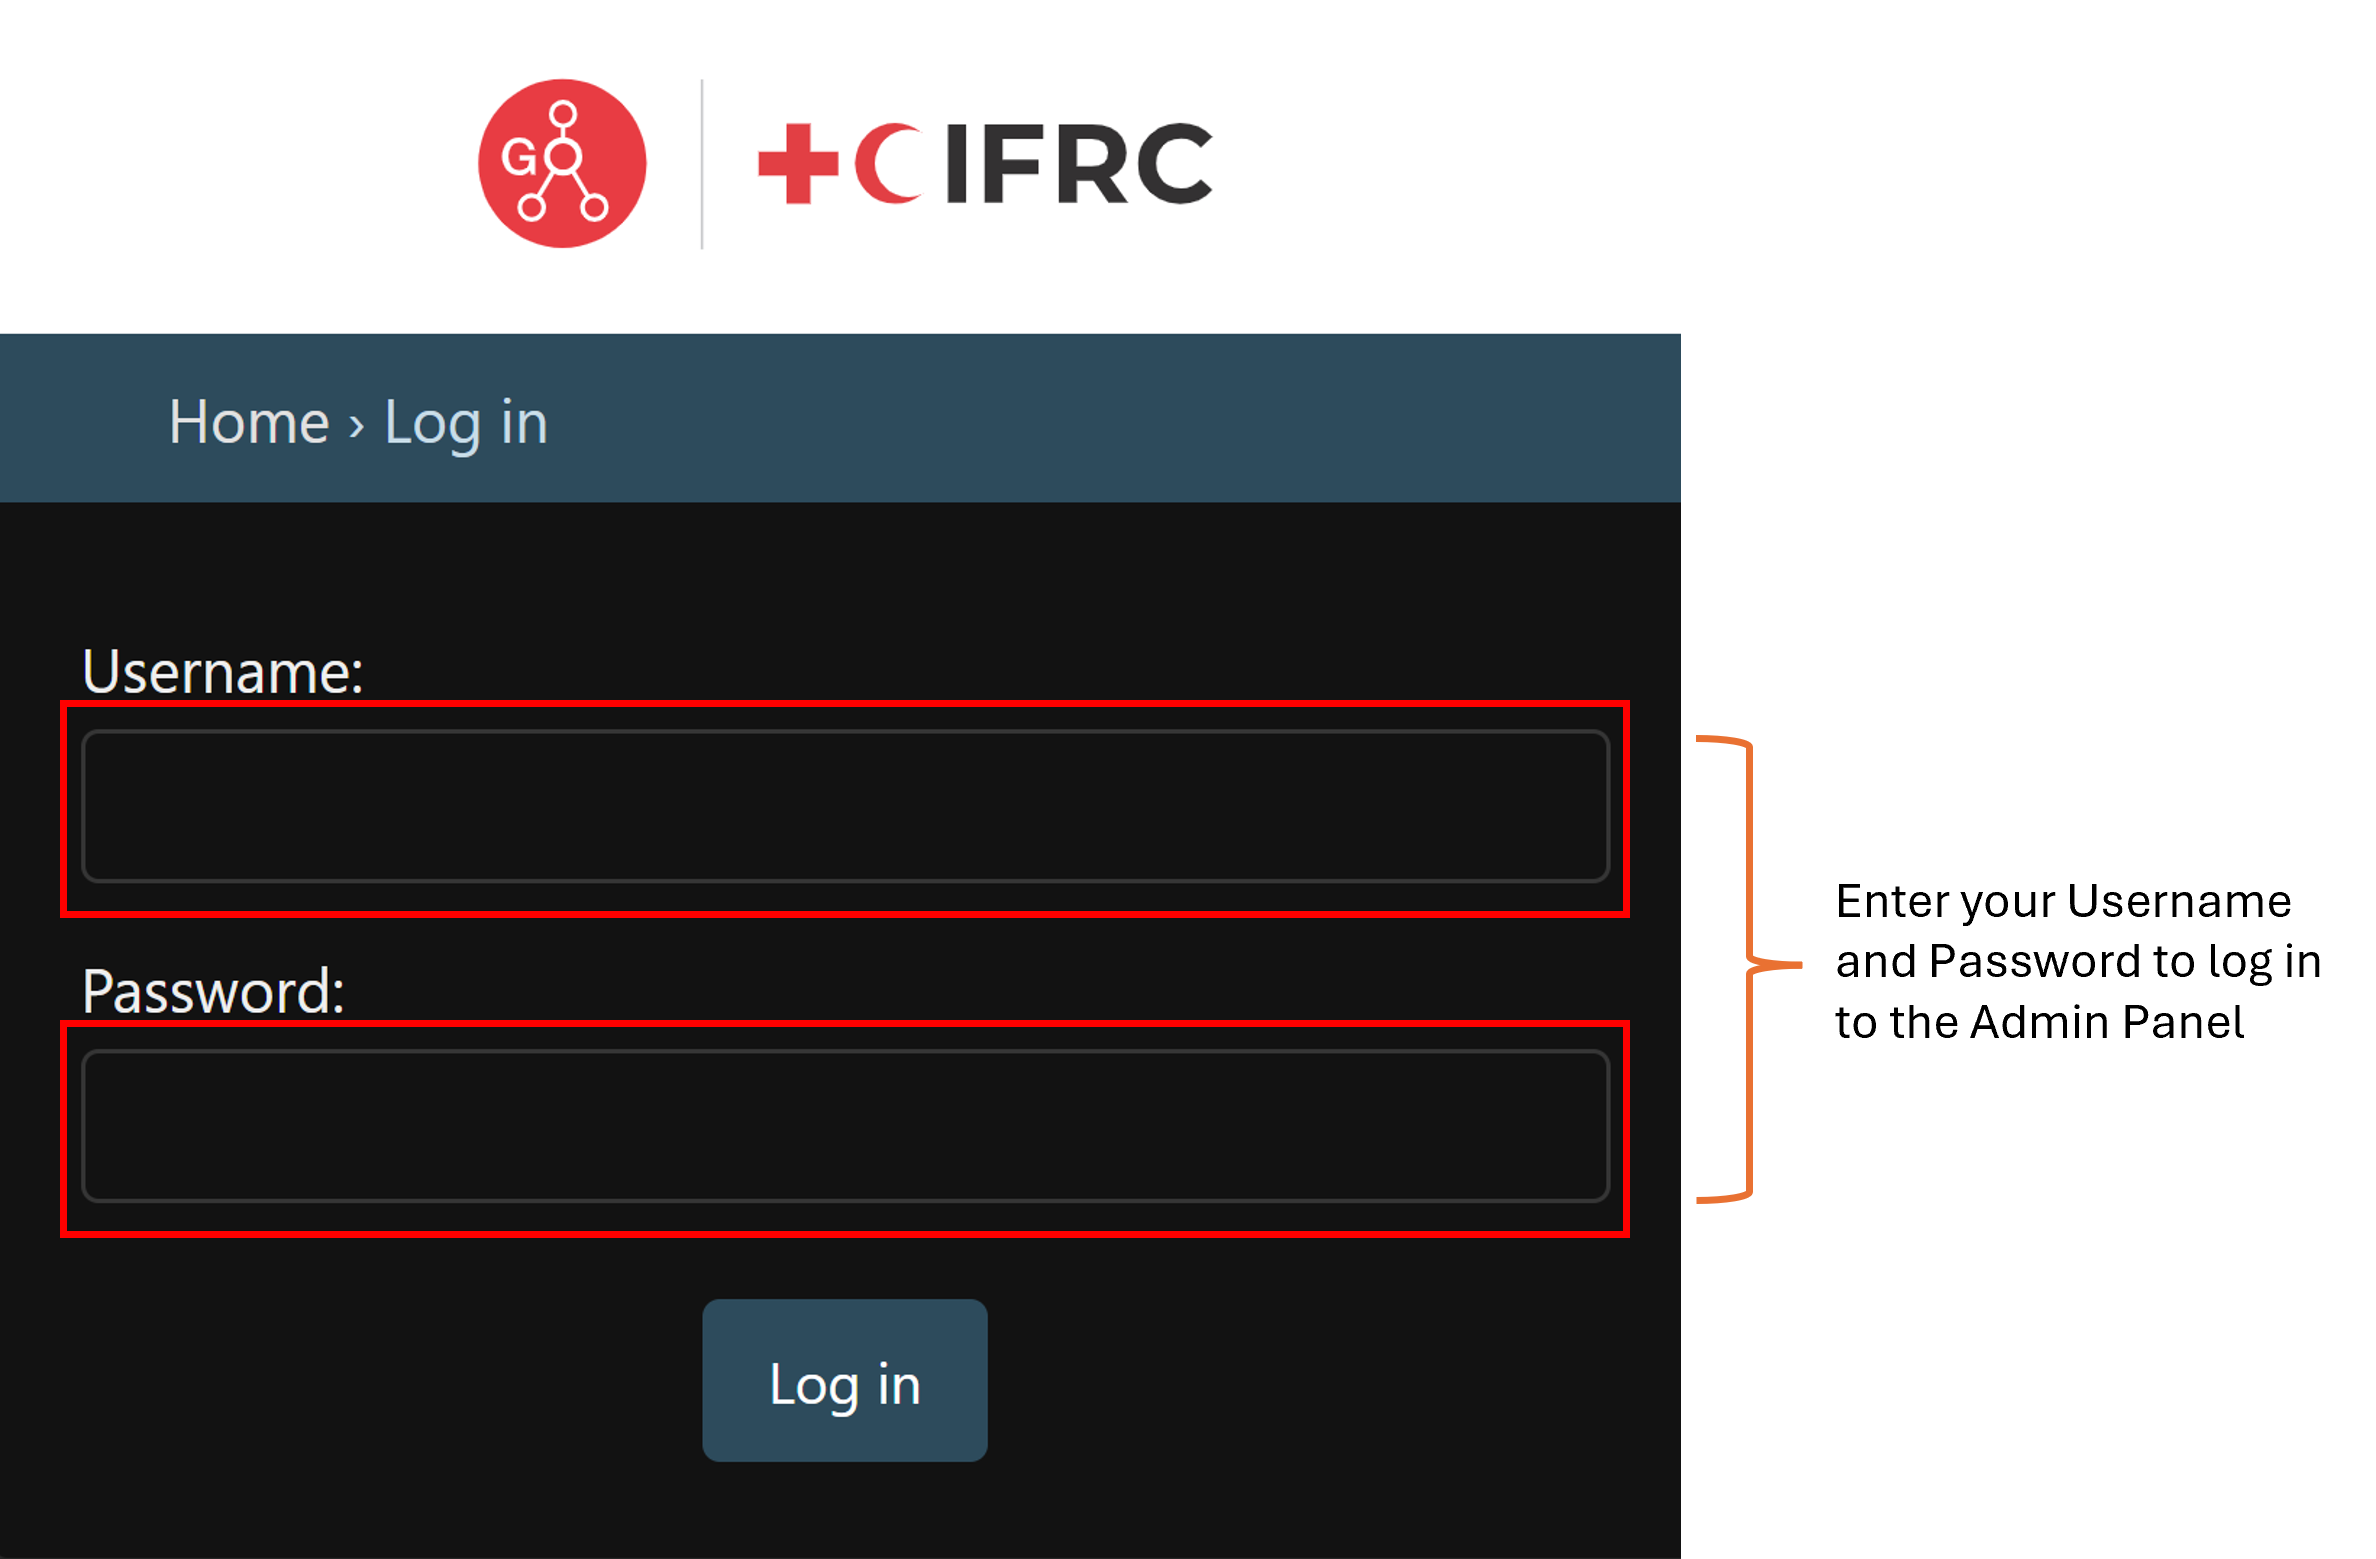
- Enter your Go admin username and password and click on the Log In button.
- After the log in is complete, the GO admin panel will appear in front of you.
- Navigate to the Authentication and Authorization Section.
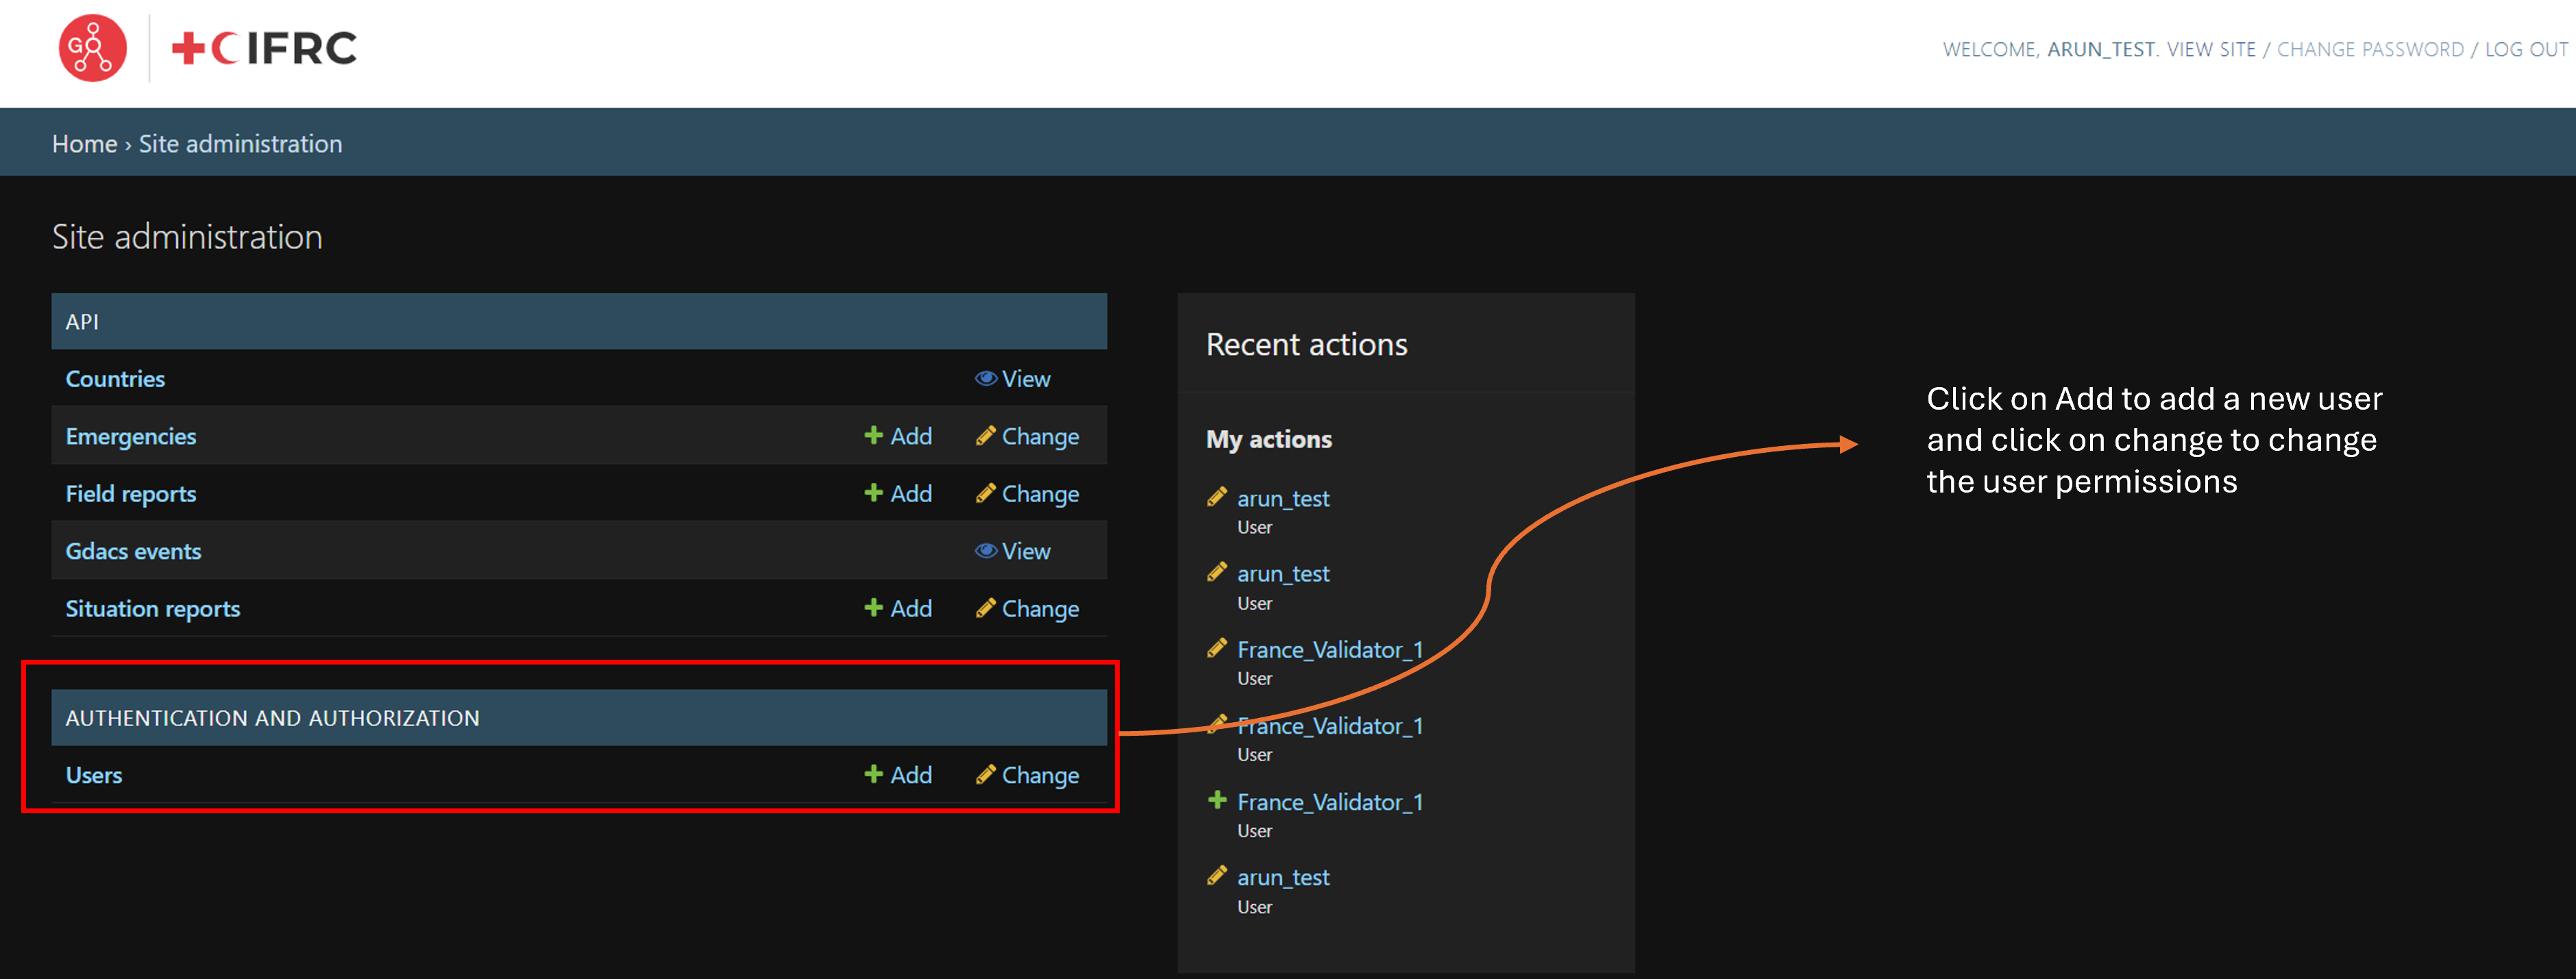
- Click on the Users button and this will open the list of users, You can also click Add button to add a new user or change button to change the permissions for a user.
- In this example we will be creating a new local validator for France.
- Click on change button next to the Users, this will open a new window with a list of users
- Search your user by the username or email in the Search bar to whom you want to assign the local units validation permissions.

- In this example our user is France_Validator_1. So we will type this username in the search bar and click on the search button to find our user.
- Once the user is found, click on the user name, in this case we will click on the France_Validator_1 username.
- Upon clicking the correct username, the user profile for that user will open.
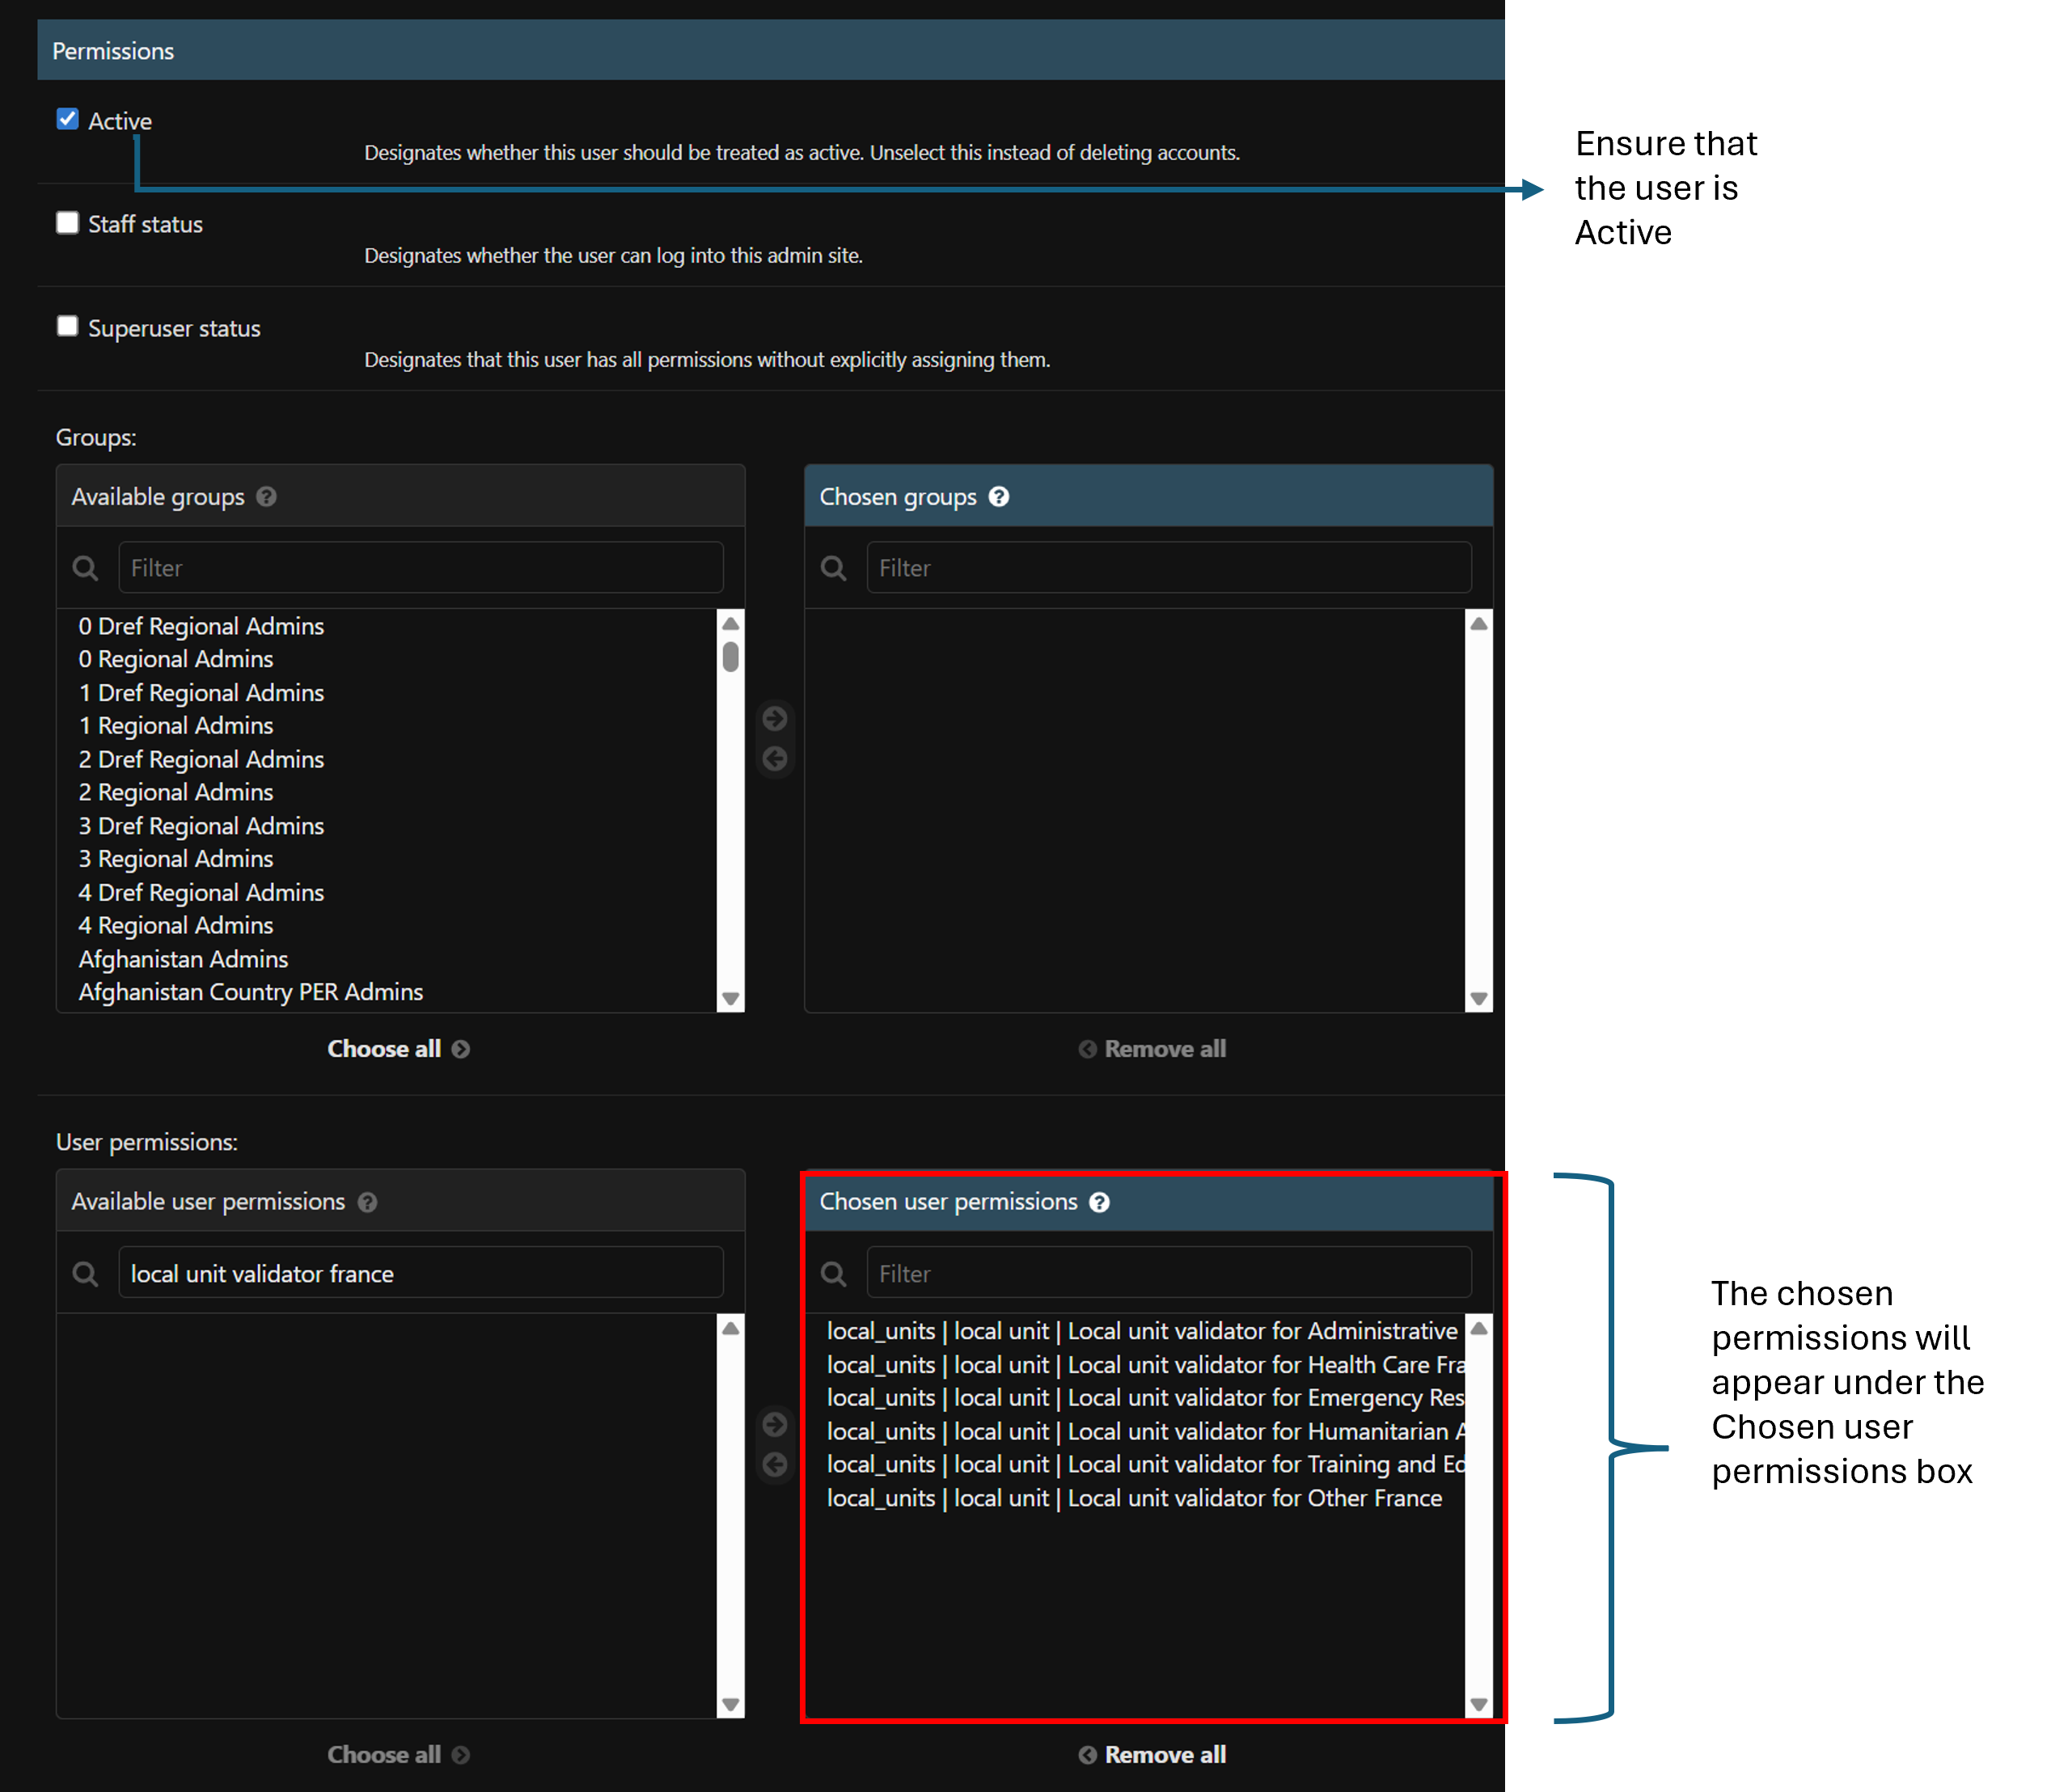
- Navigate to the User Permissions under Permissions section where we can manage user permissions. Make sure that the Active check box is checked. This ensure that the user is active.
- In this case we are assigning the local units validation permission for France to the user.
- In the filter bar under Available user permissions box , you can search and filter for the validation permissions for the country and local unit type
- In this example we will type local unit validator France, in order to filter for local units validation permissions for France.
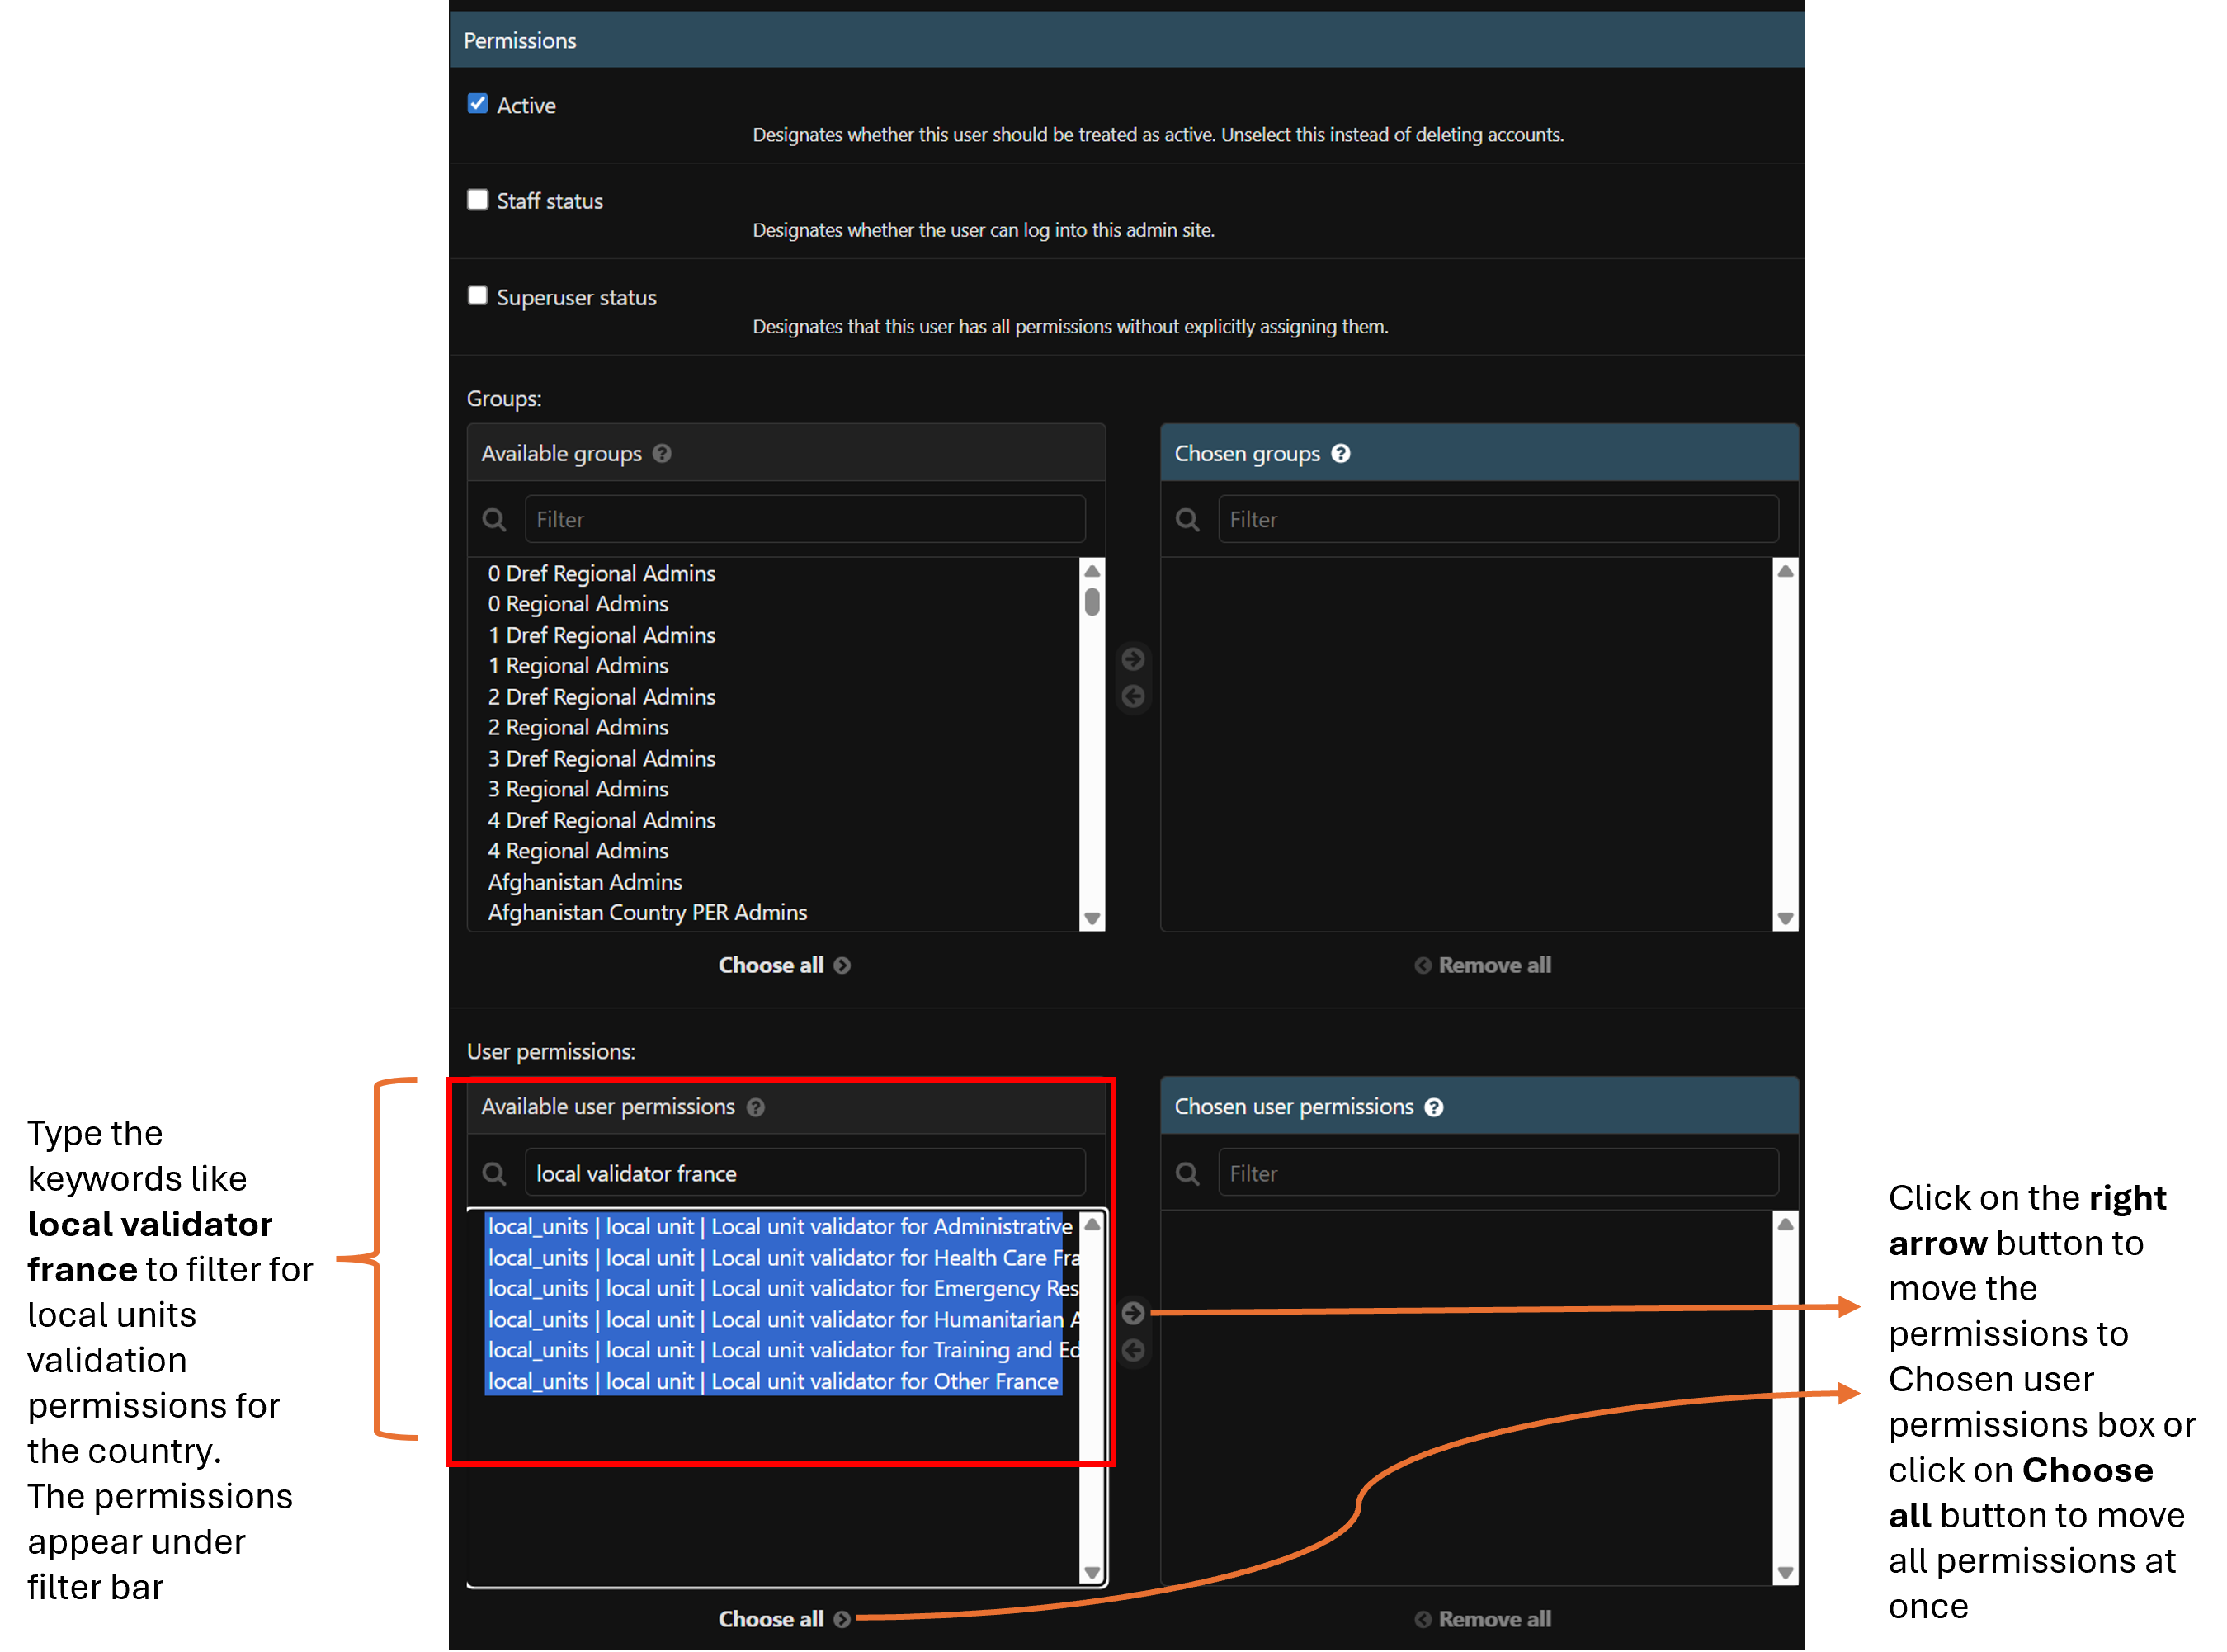
- The validation permissions will appear under the Available user permissions box and we can click on individual permissions to select them.
- Click on the right arrow button to move the permissions from Available user permissions box to Chosen user permissions box.
- We can also click on the Choose all button to move the permissions from Available user permissions box to Chosen user permissions box.
- We can either assign all the permissions meaning that the user can validate all the local unit types for that country or assign only permissions based on local unit type.
- This mean you can give permissions to validate all local unit types for a country or a select few of them based on your requirements.
- In this case we will choose all the permissions, meaning that the our user can validate all types of local units for France
- Once the permissions are moved to the Chosen user permissions box, navigate to the bottom of the page and click on SAVE button, to save the user.
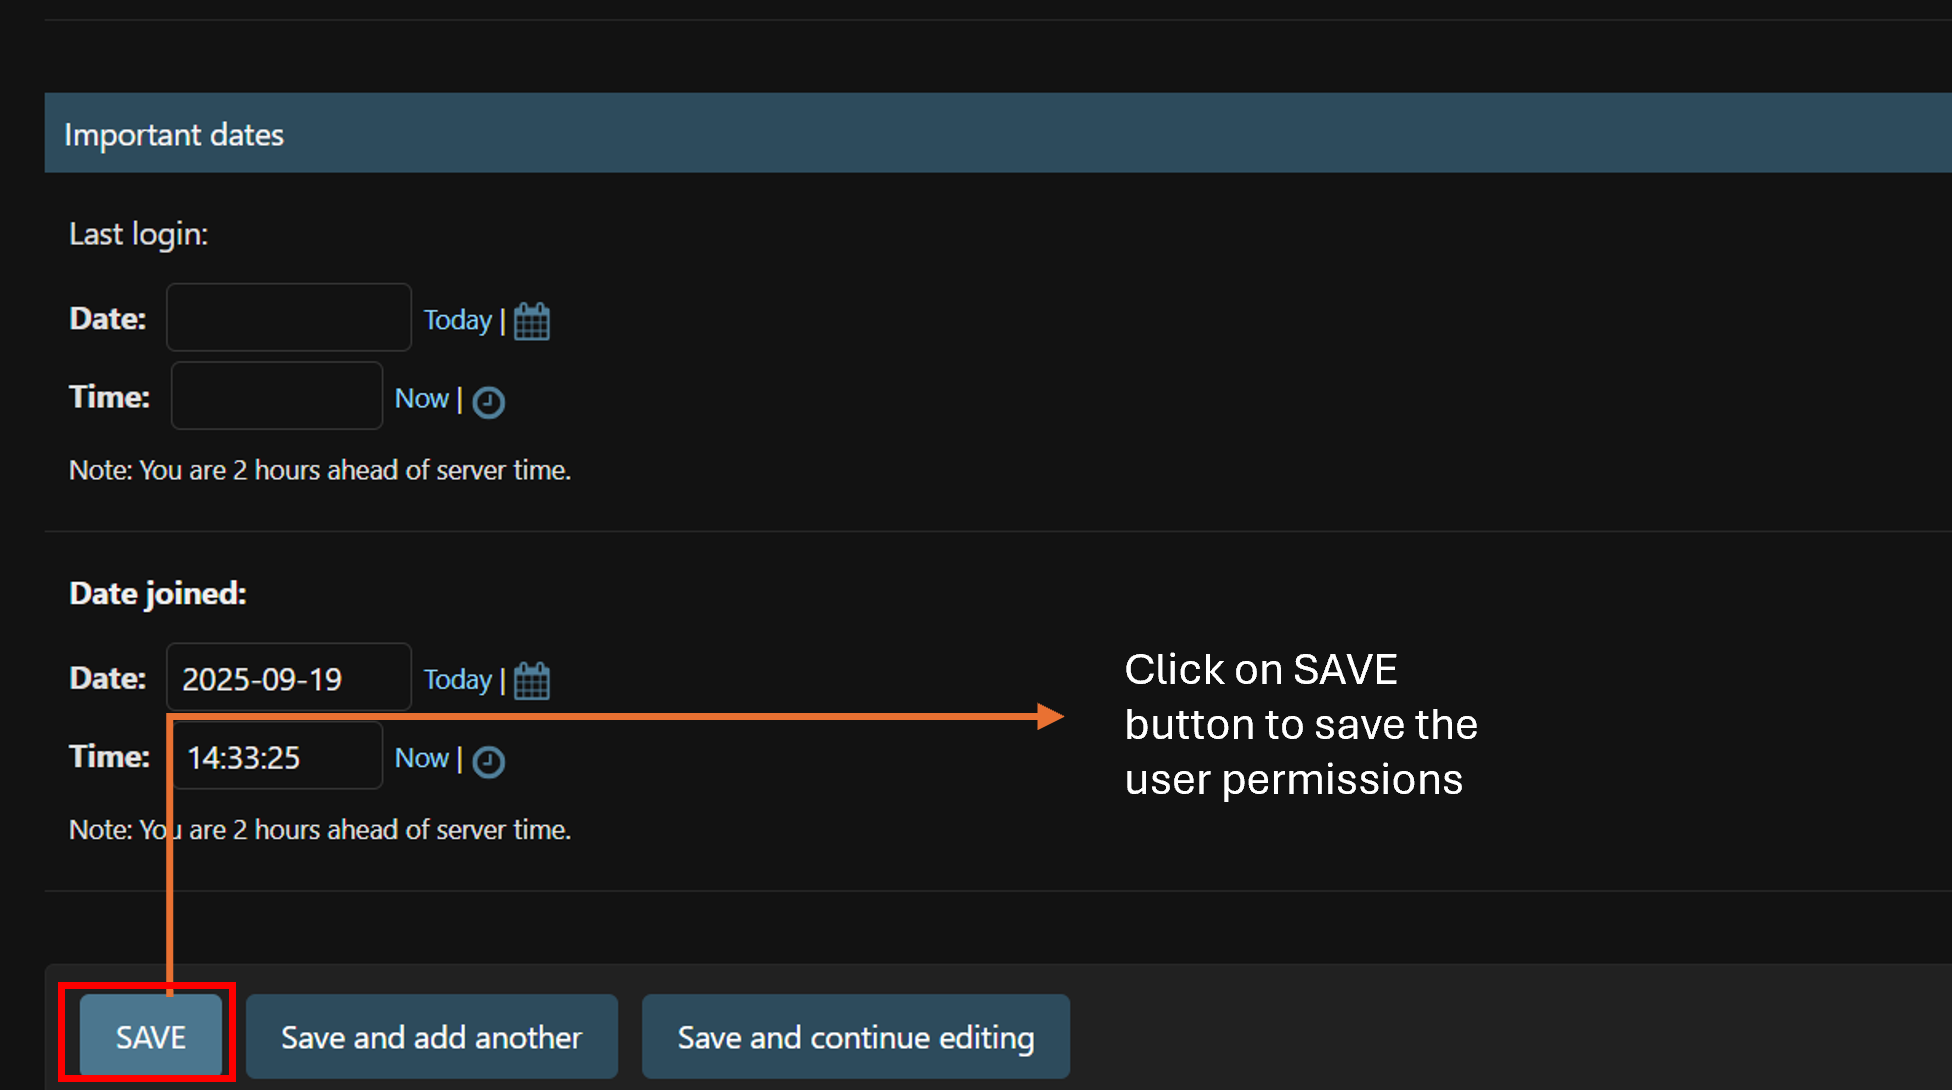
- Upon clicking SAVE button you will see a green notification saying that the user was changed successfully.
- It is also possible to assign a user permissions to be a validator of more than one country and this can be useful in cases when we want to assign validators from country delegations.
- To assign local unit validation permissions for more than one country, you need to filter the validation permissions for the countries one by one.
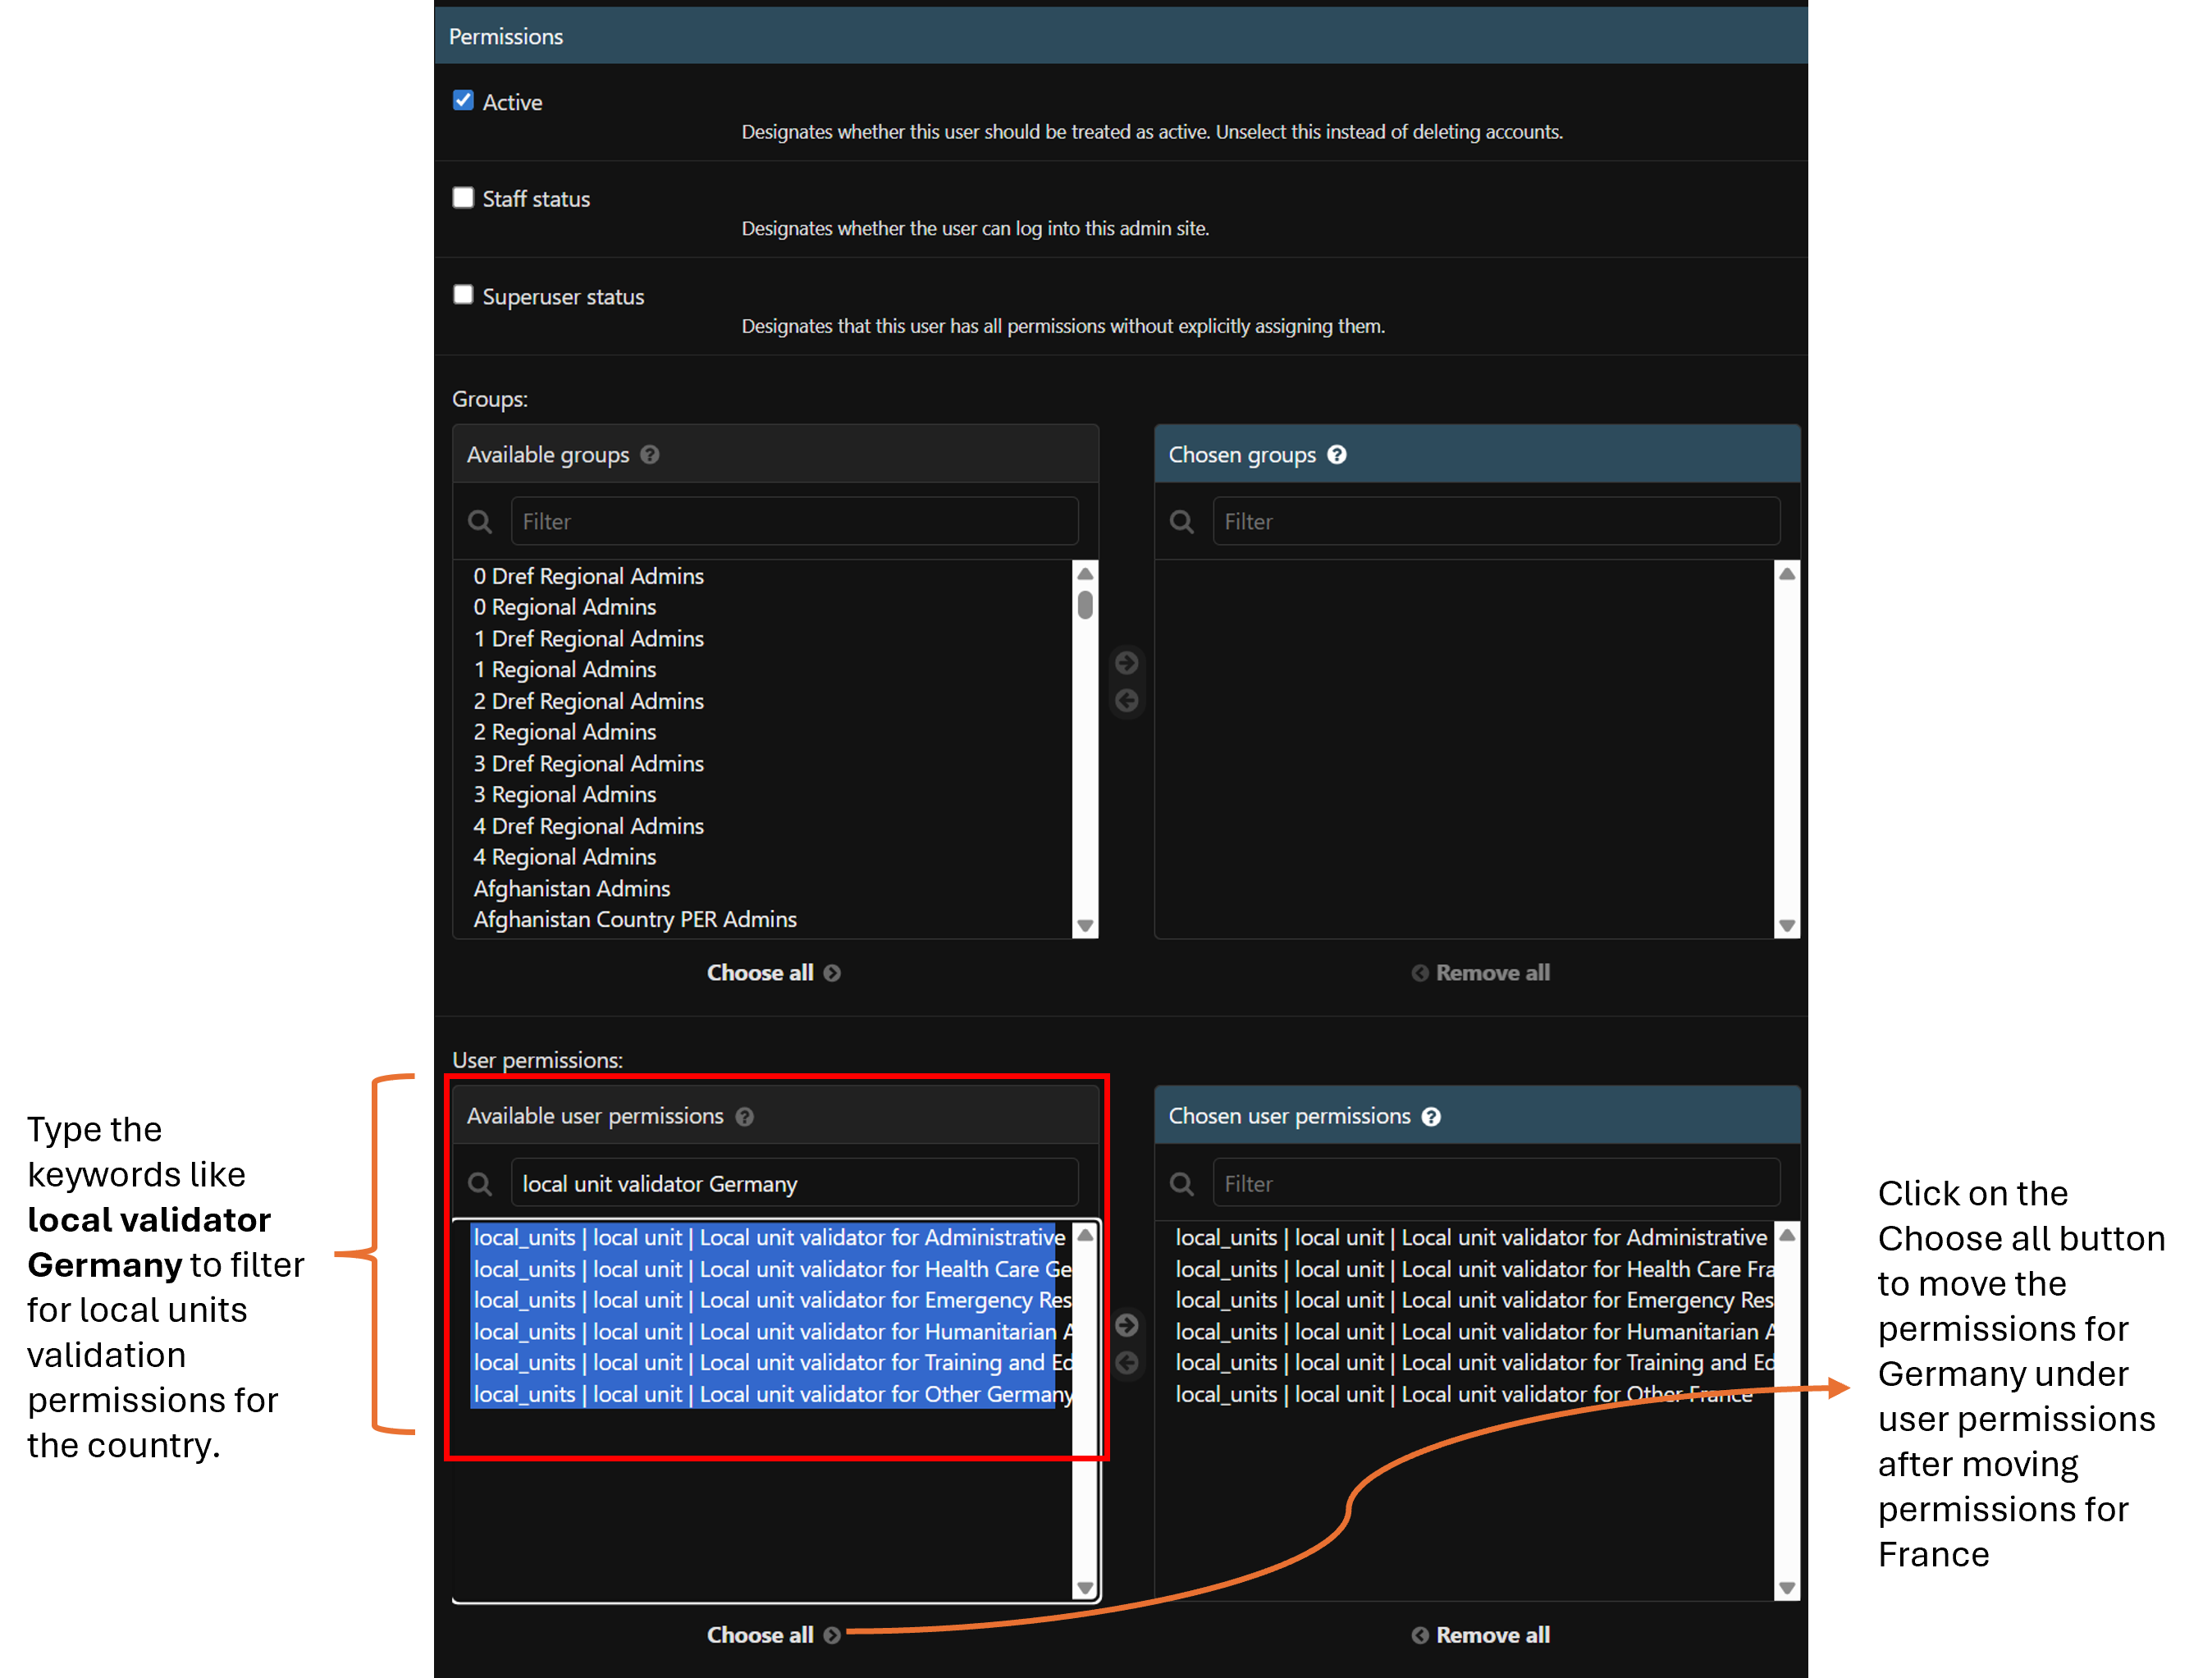
- In this example we want to provide local units validation permissions for both France and Germany, therefor first we will type local unit validator France in the filter bar under Available user permissions box and then move all the permissions to the Chose user permissions box and then repeat the same procedure for Germany.

- Once the permissions are moved to the Chosen user permissions box, scroll to the bottom of the page and click on SAVE button to save the user.
- Now the user can validate local units of all type for both France and Germany.
¶ Permissions for Regional Validator
The process of assigning regional level validator permissions is the same as assigning that for a local level validator.
- Go to the Authorization and Authentication section of the GO admin panel and select Users.
- Use the search bar to find the user who will be assigned regional validator permissions.
- Click on the user’s name to open their profile.
- Under the Permissions section, navigate to User Permissions.
- Ensure the Active checkbox is selected, confirming the user’s account is active.
- In the filter bar under Available Groups, type local unit validator Europe to display validation permissions for all local units in the Europe region.
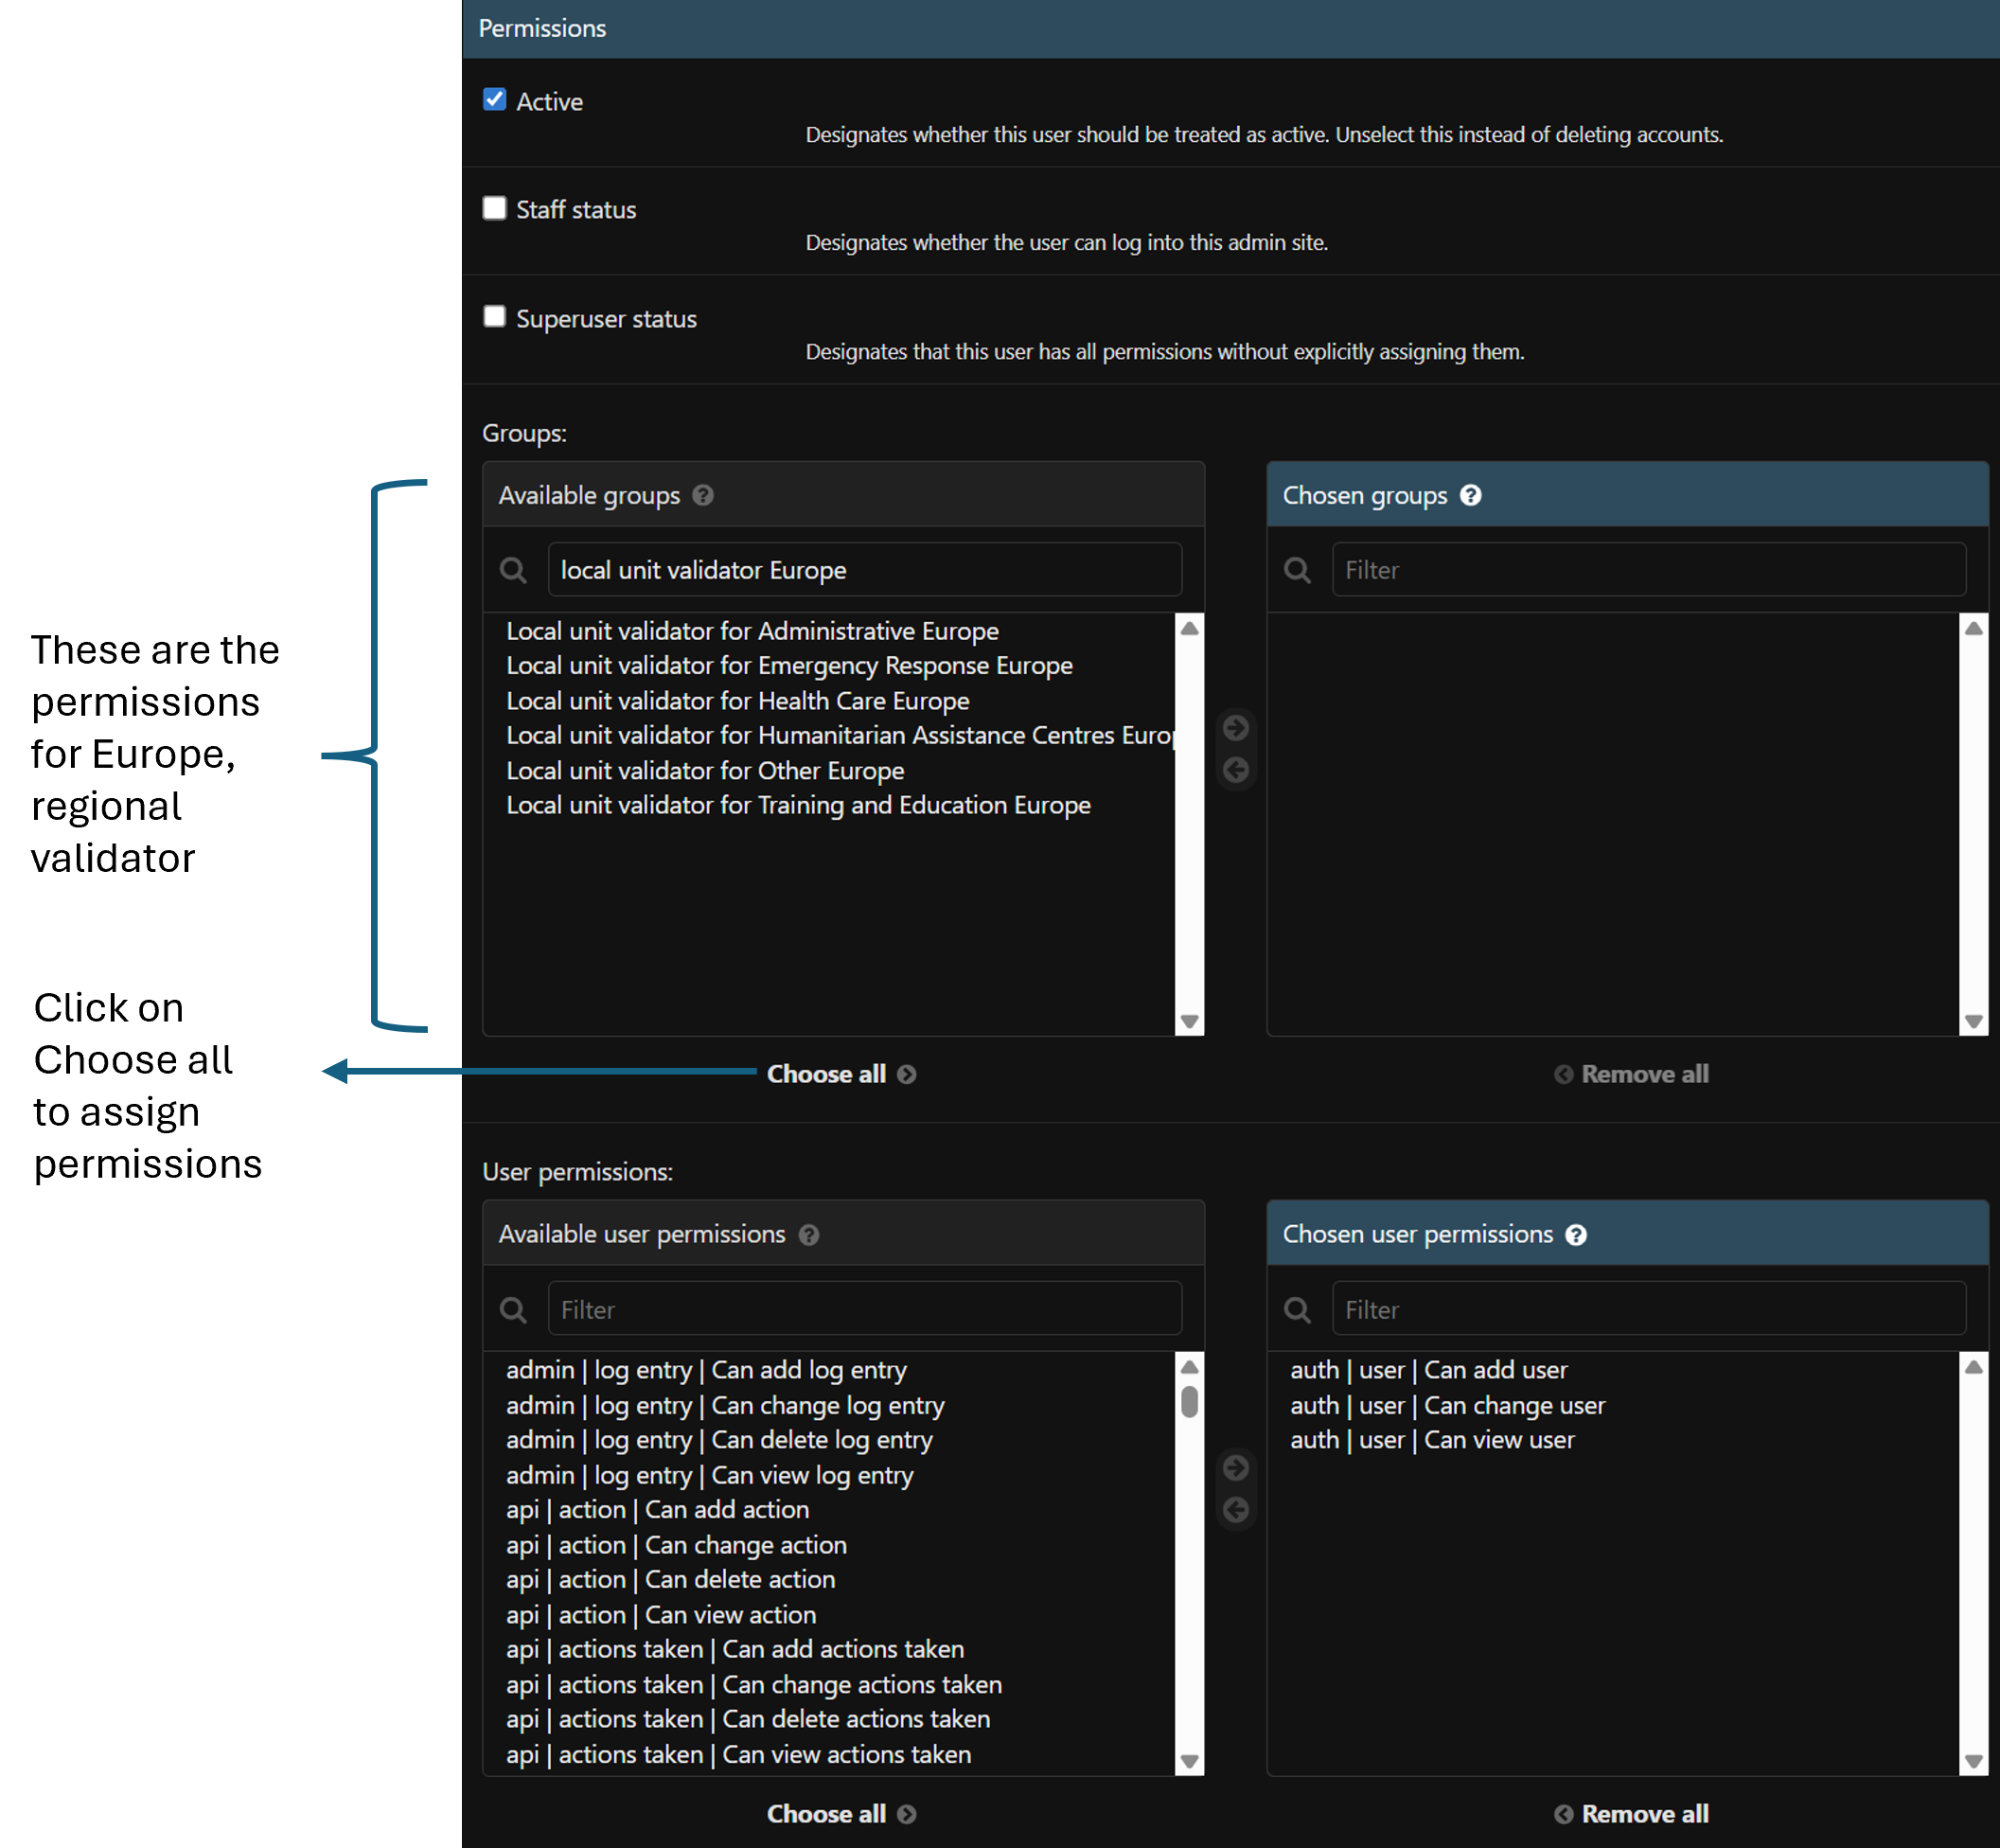
- To grant permissions for all local unit types in Europe, click the Choose all button; alternatively, select specific permission types and use the right arrow to move them to the Chosen groups box.
- Scroll to the bottom of the page and click SAVE to apply the changes.
- The user now has regional validation permissions for all local units in the Europe region.
¶ Permissions for Global Validator
- Navigate to the Authorization and Authentication section in the GO admin panel and select Users.
- Enter the user’s name in the search bar to locate the individual who will receive global validator permissions.
- Click on the selected username to view their profile.
- Under the Permissions tab, go to User Permissions.
- Ensure the Active checkbox is selected, confirming the user is active.
- In the filter bar beneath Available Groups, type local unit validator global to display global validation permissions for all local units.
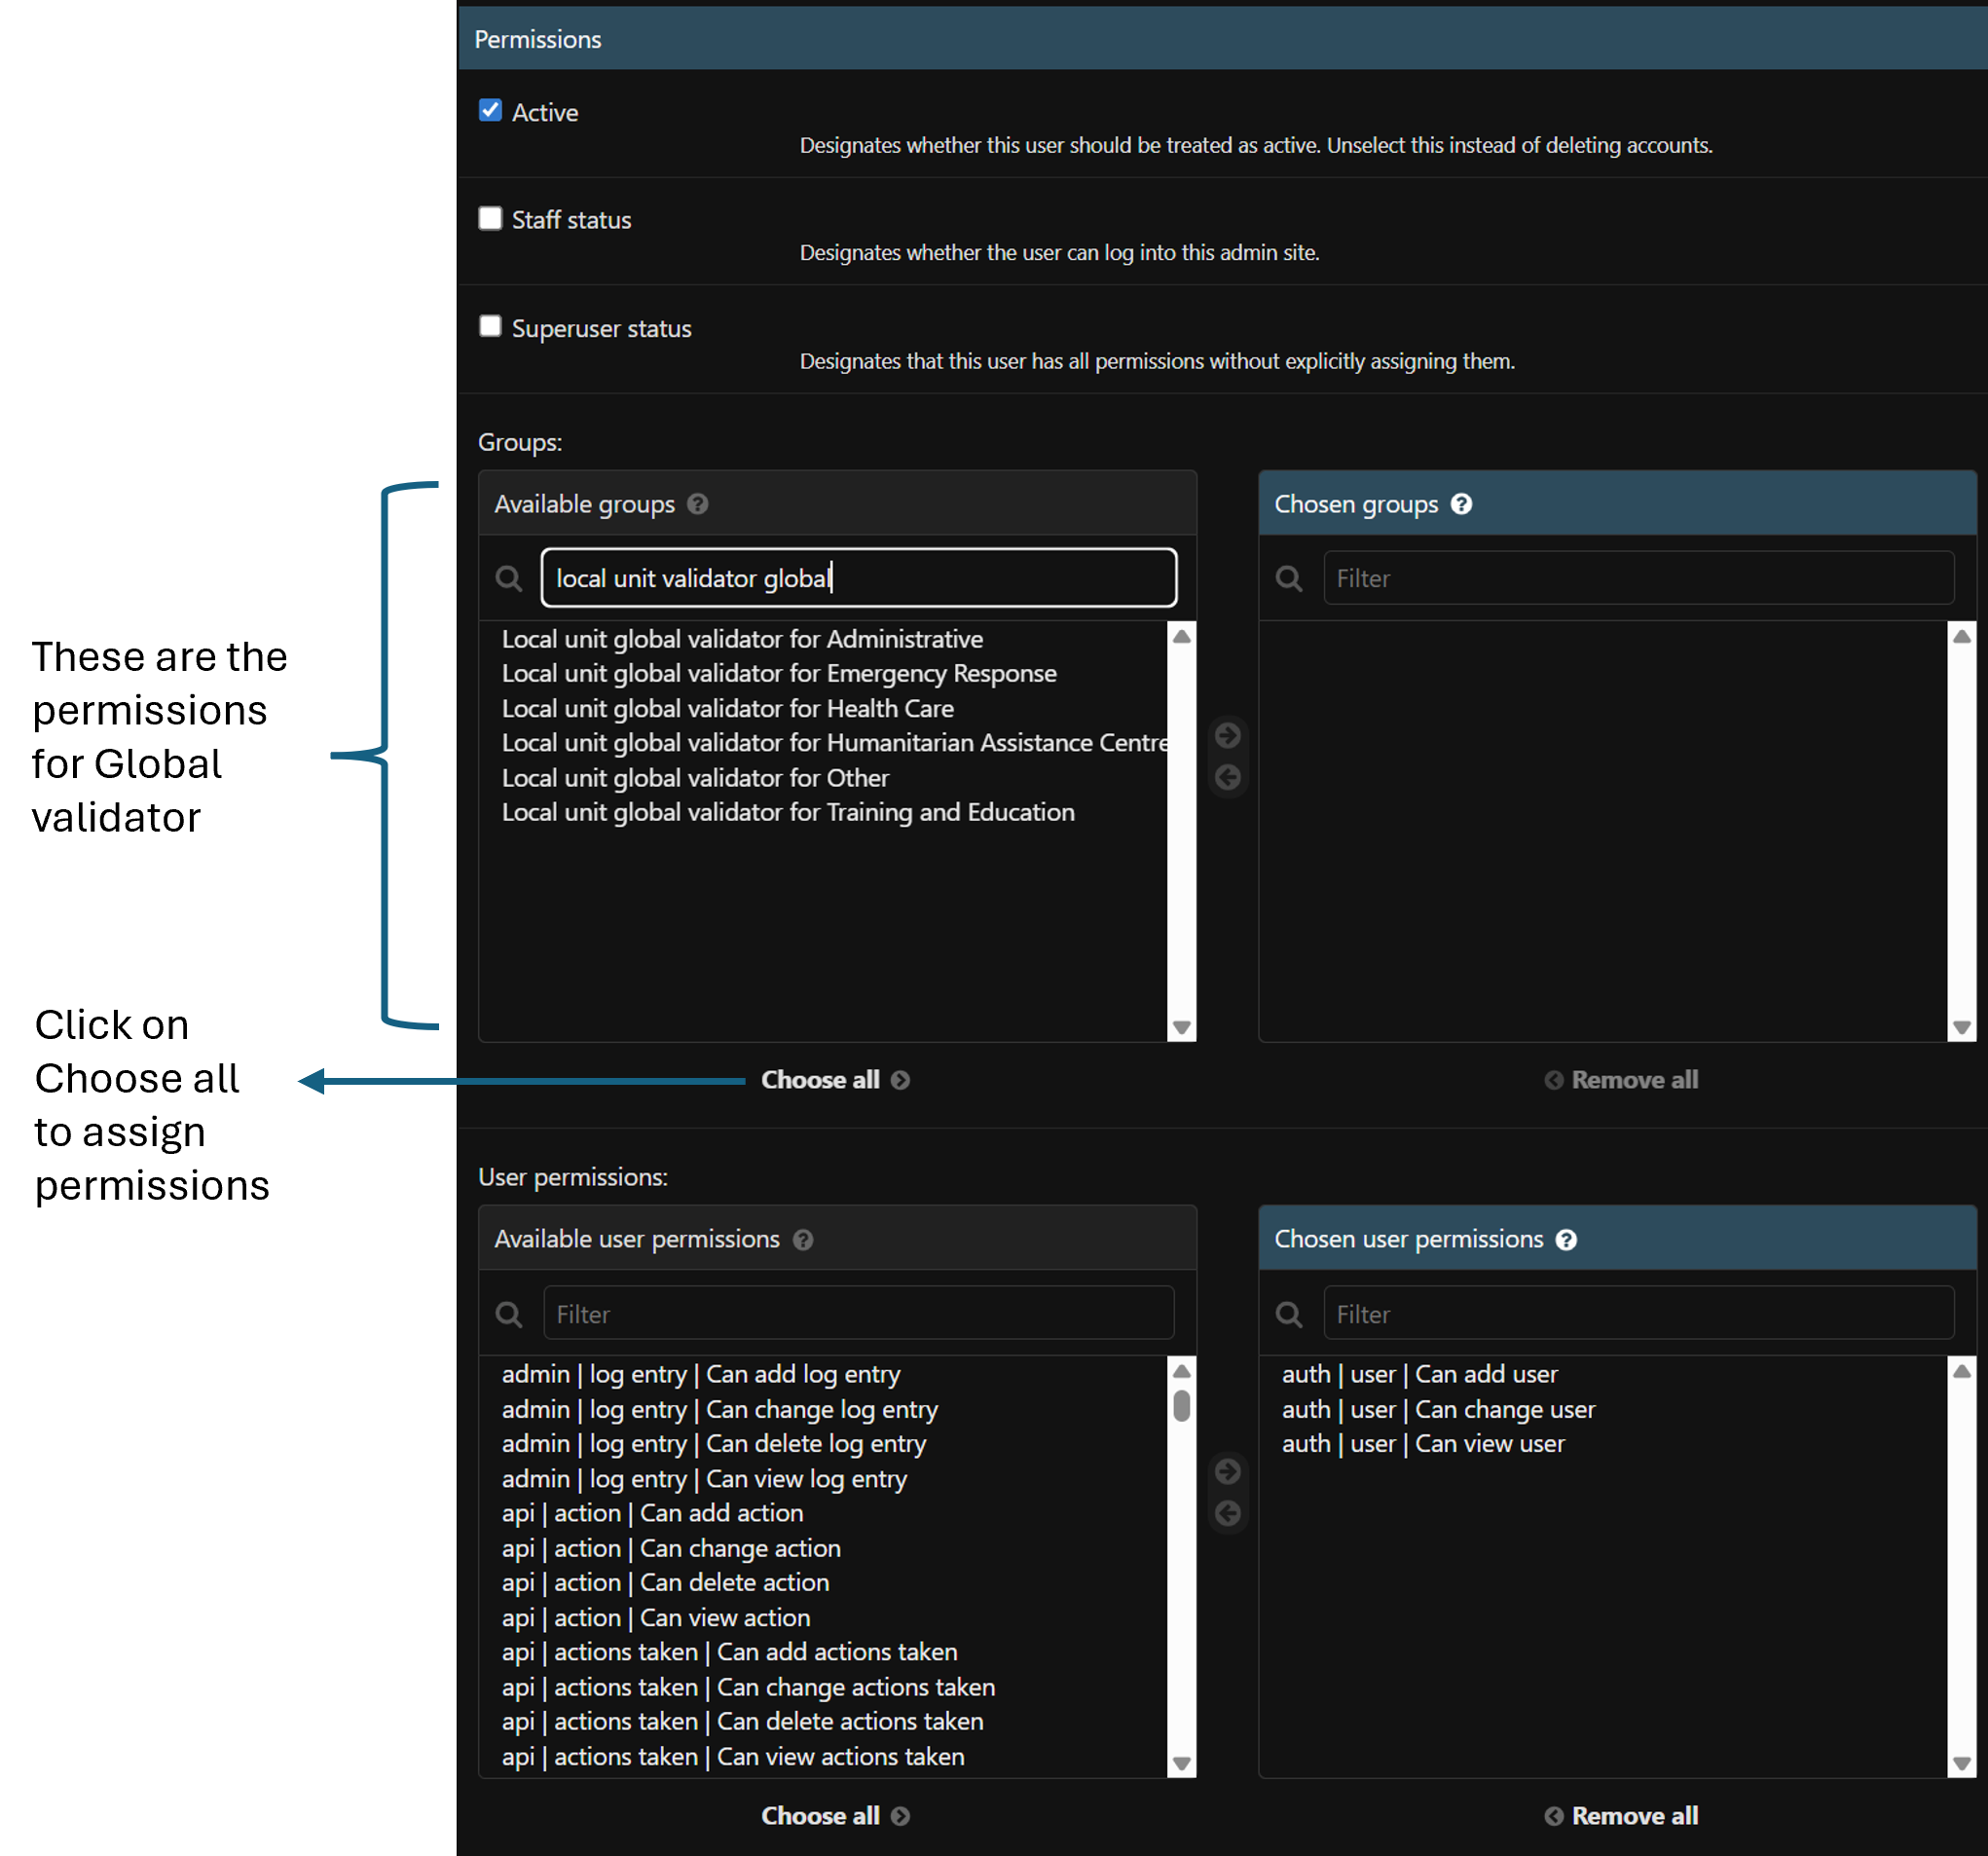
- To grant permissions for all global local unit types, click the Choose all button; if assigning specific permissions, select individual types and use the right arrow to move them to the Chosen groups box.
- Scroll down and click SAVE to confirm and apply the changes.
- The user now holds global validation permissions for all local units.